


With these three tricks, Denoise and Glare, Volumetric, and HDRI lighting you can add depth and realism to your blender creations. Hopefully, this short tutorial helped you improve your creations.
I recently read a guide on CgCookie on improving your lighting in Blender. It was a fantastic guide but gave too much information for new users. If you are a new user of Blender here are three simple tricks to improve lighting in a scene you have created. This is especially important for interior scenes. I have created one scene that is lacking due to the use of light and have shown how simply changing some settings can add to your creations.
First Trick: Denoise and Glare Lighting
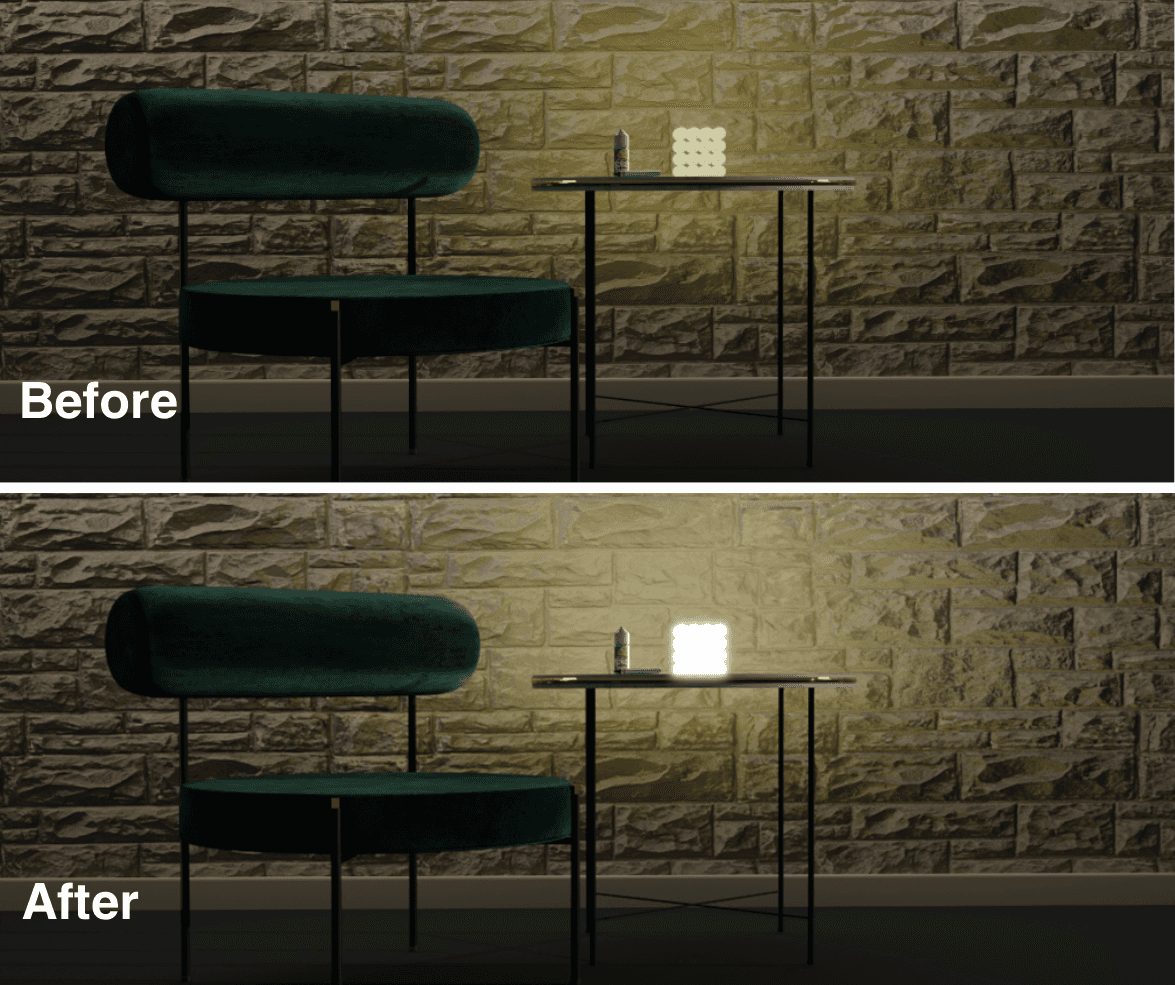
Here I have created a velvet lounge chair, a table, and a lamp. I used a compositing node tree for this render. The scene looks fine, but the lighting seems off. So, I focused on the lamp and tried to give it a natural glow. When this is incorporated it creates a more dynamic and realistic environment. The first thing I did was to enable Denoise on the render properties. This eliminates the noise on the image while retaining the details. Following this I added the viewer node to be able to see how the nodes were affecting the rendered image and added Denoise and Glare nodes in order to alter the illumination in the image.
Second Trick: Volumetric Lighting
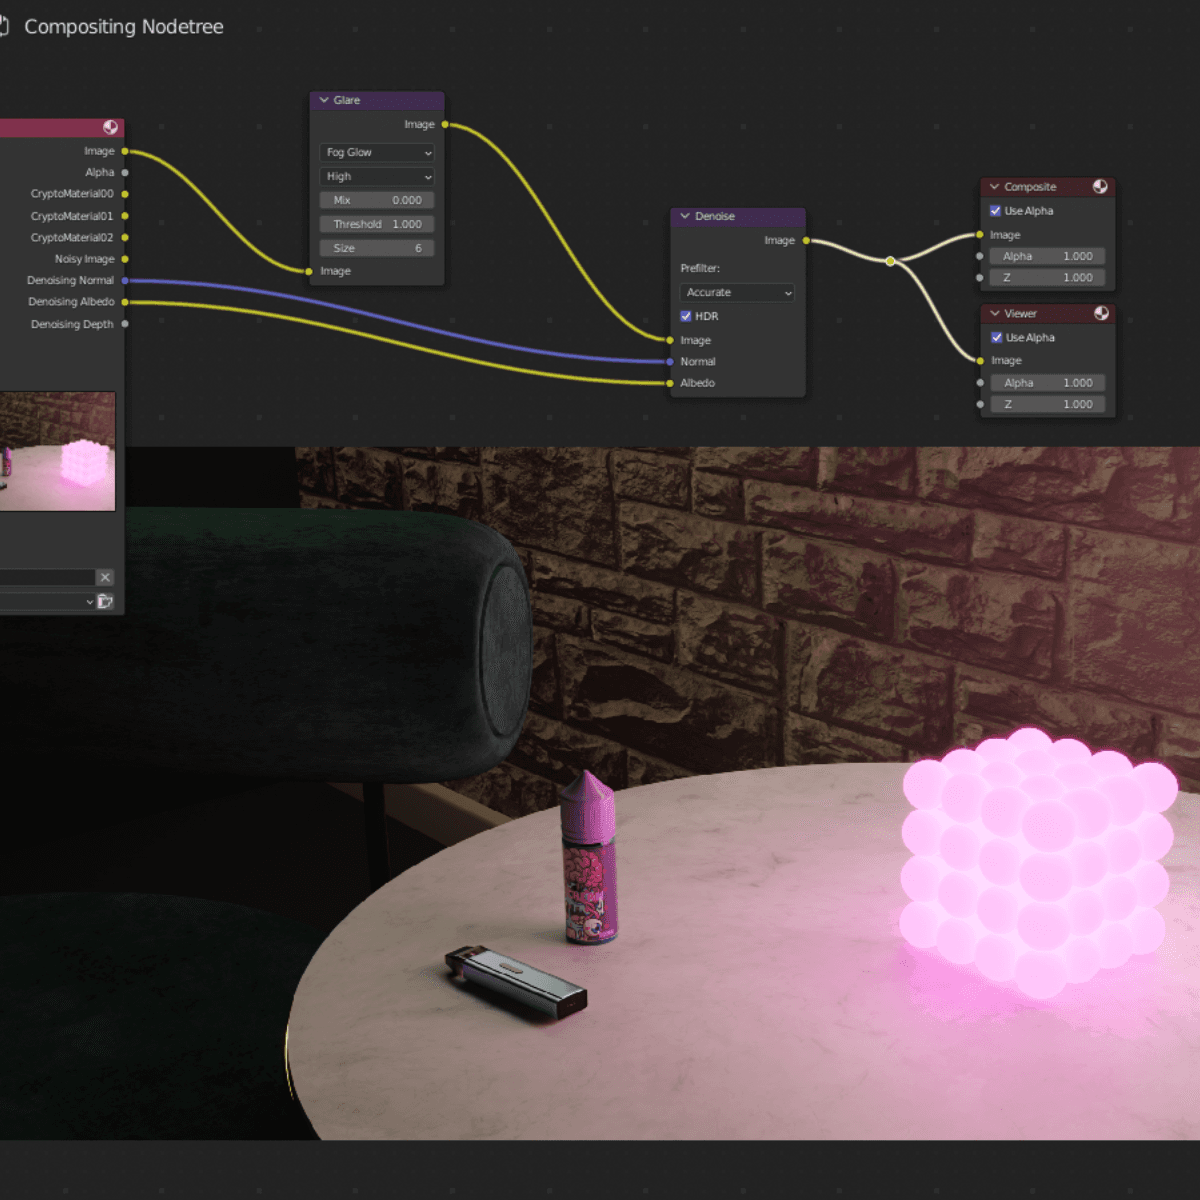
While the scene has improved the lamp is now not defined, the light washes out the details. To help define it I added a cube inside the lamp and applied a principled volume node and changed the density value to 0.010 as well as the Anisotropy. I noticed a big difference when adding the volumetric shader as it gives the scene a cinematic feel. I believe this cinematic mood is because I also decreased the emission value for the lamp from 35.00 to 10.00. I also changed the color to a muted pink instead of a harsh yellow. This coupled with decreasing the backlighting enhanced the contrast between light and shadows which gives it a cinematic feel.
Third Trick: High Dynamic Range Imaging Lighting
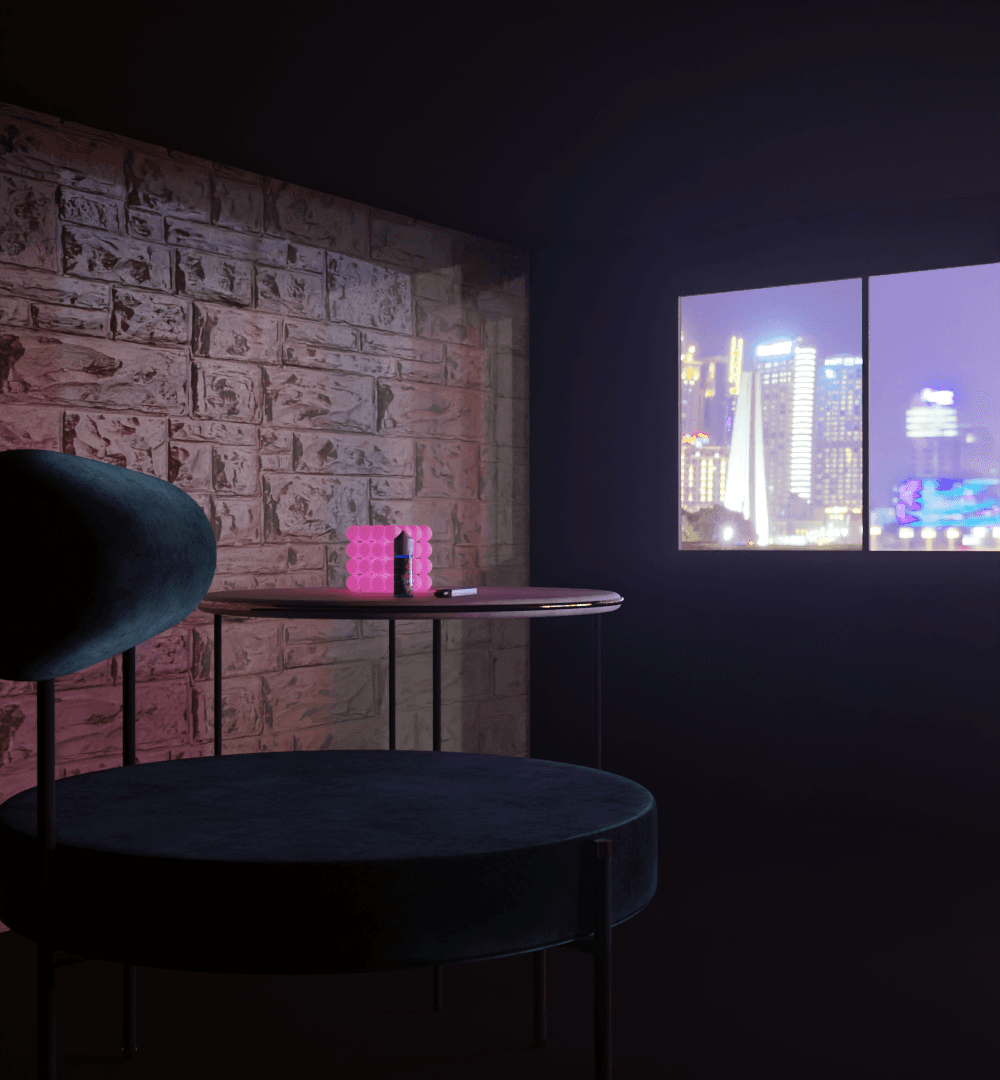
The scene is a lot better now but it still feels a little artificial. We need to add more detail such as a window but we have to make sure the lighting is accurate. So, I included High Dynamic Range Imaging (HDRI) for the background city. You can find great examples for your own use at blenderkit.com
This allowed an additional light source to come from ‘the city lights’. I think the inclusion of the window negates that feeling and makes it appear more lifelike. Furthermore, I also added hue saturation value, color balance, and RGB curve nodes to experiment with manipulating colors.
Suggested
Continue Reading
More articles you may find useful, carefully selected from our journal


